Checkpoints
Lab Completion
/ 10
Getting started with Flutter Development
GSP885

Overview
Flutter is Google's UI toolkit for building beautiful, natively compiled applications for mobile, web, and desktop from a single codebase. Flutter works with existing code, is used by developers and organizations around the world, and is free and open source.
In this lab, you will create a Flutter app using generated template code. The basic Flutter interface provides a simple example to get started programming in Flutter.
What you'll learn
- How to write a Flutter app that looks natural on iOS, Android, and the web
- Basic structure of a Flutter app
- Finding and using packages to extend functionality
- Using hot reload for a quicker development cycle
Prerequisites
Based on the content, it is recommended to have some familiarity with:
- Flutter
- Dart
Setup
Before you click the Start Lab button
Read these instructions. Labs are timed and you cannot pause them. The timer, which starts when you click Start Lab, shows how long Google Cloud resources will be made available to you.
This hands-on lab lets you do the lab activities yourself in a real cloud environment, not in a simulation or demo environment. It does so by giving you new, temporary credentials that you use to sign in and access Google Cloud for the duration of the lab.
To complete this lab, you need:
- Access to a standard internet browser (Chrome browser recommended).
- Time to complete the lab---remember, once you start, you cannot pause a lab.
Task 1. Open the Code Server editor
In this lab, we will use a custom editor that includes the Flutter and Dart extensions. From the initial Qwiklabs panel:
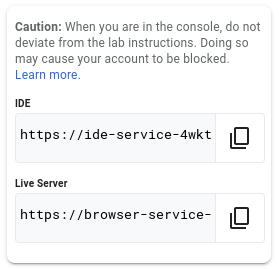
- Copy the IDE value displayed.
- Paste the IDE value into the a new browser window.
Note:
Code Server Editor:- Based on VS Code
- Supports Extensions
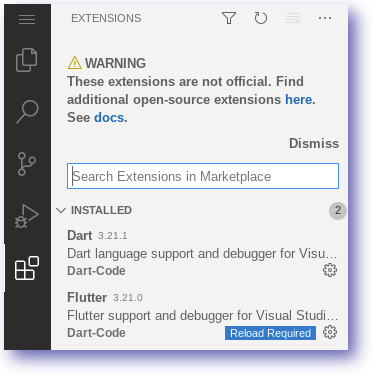
Task 2. Flutter extensions
Flutter extensions have been installed within the editor.
-
In the editor select the extensions icon:
Note:
- Flutter extension provides support for developing with the Flutter Framework
- Dart language extension will automatically be installed as part of the Flutter extension
Task 3. Create a Flutter template
In this section create a Flutter Web application called startup_namer.
- Click the navigation menu button (i.e. left hand side, three horizontal lines).
- Open a Terminal within the browser by selecting New Terminal:

- In the terminal enter the following command:
- Generates a sample application based on a template.
- Provides support for different platforms (e.g. Android, iOS and Web)
- Hierarchy includes all the files required for a basic Flutter application
- Move to the startup namer directory:
- Close the terminal window:
The startup_namer directory and template code have now been created.
Task 4. Exploring the Flutter code
In this section edit the Flutter Web application.
Use the editor to open the startup_namer directory created in the previous step.
-
From the main panel select the
ExplorerIcon: -
Select the
Open Folderoption. -
Open the
startup_namerfolder:
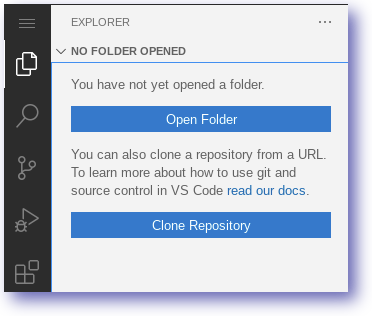
- The editor view will change to the Folder view.
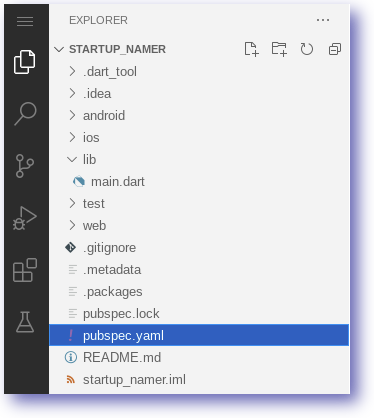
- Explore the template code, especially the
lib/main.dartandpubspec.yamlfiles.
At this point it is worth pointing out some information about the editor:
- Generates a sample application based on a template.
- Provides support for different platforms (e.g. Android, iOS and Web)
- Hierarchy includes all the files required for a basic Flutter application
- The lab focuses on building a Web application
Task 5. Running the Flutter Web application
In this section run the Flutter Web application from the command line.
- In the editor, open a terminal.
- Ensure the directory is set to
startup_namer.
- Uses a web server
- Application will be run in the browser
- Application will bind to the machine IP/PORT
- Run the Flutter web server:
- The running web server should look similar to below:

-
Copy the
Live Serverfrom the Qwiklabs panel. -
Paste the address into a new browser tab.
-
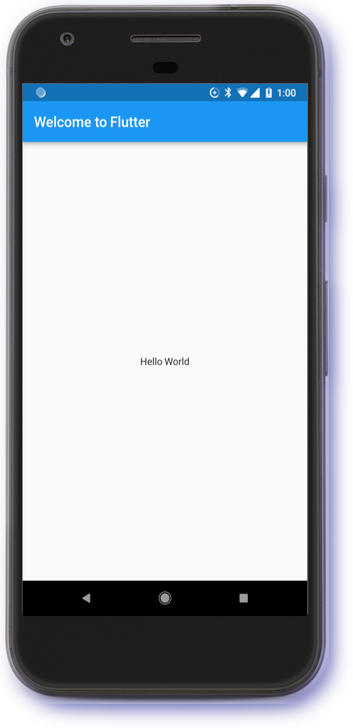
The browser will render the web application:
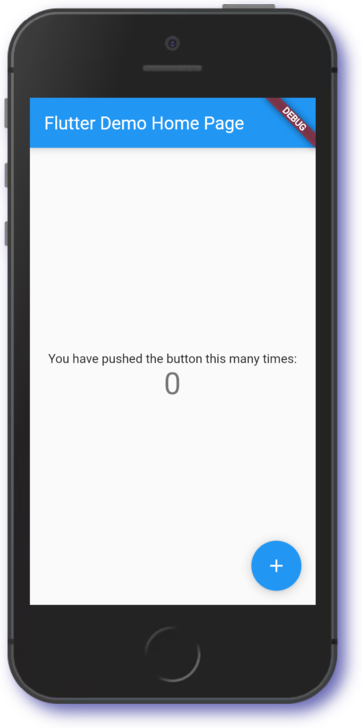
Feel free to interact with the running application.
Task 6. Flutter Hot reload
Flutter supports Hot reload which means changes can be made to the application dynamically.
- Support for different platforms (e.g. Android, iOS and Web)
- Watch the YouTube video Hot reload?! | Decoding Flutter
In this section we use the Hot reload function to change the Title.
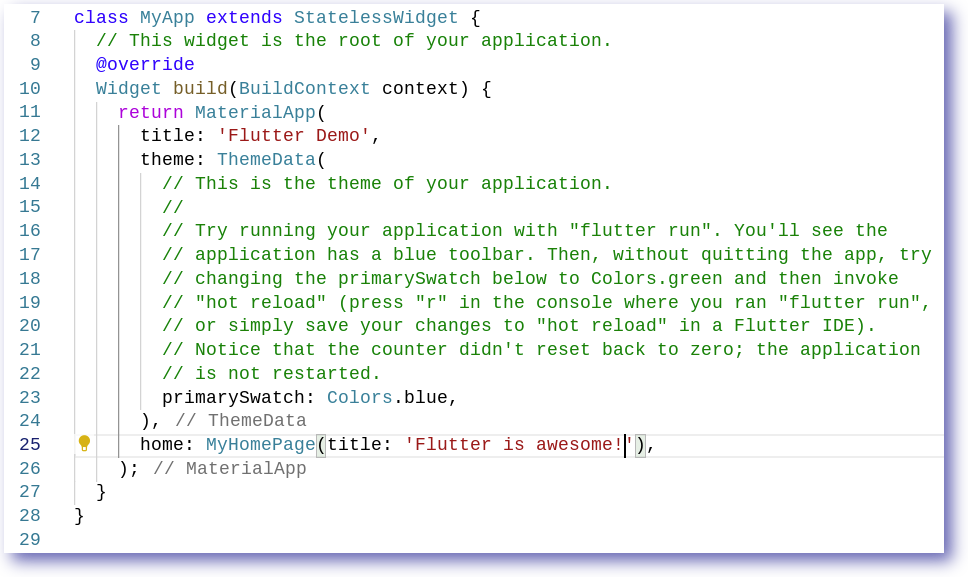
- In the editor, amend the file
lib/main.dart. - Look for
class MyAppand find the Title fieldFlutter Demo Home Page.

- Amend the HomePage
titlevalue online 25to the following:
-
Save the editor changes made i.e.
CTRL+S. -
The
lib/main.dartcode should now look similar to below:
- Click in the open Terminal window, and press r:

-
Switch to the
Live Serverbrowser tab. -
Press
CTRL+Rto reload the page.
Awesome work getting started with Flutter.
Click Check my progress to verify the objective.
Congratulations!
You have successfully completed the lab and demonstrated your knowledge of Flutter. Over the course of this lab, you have performed the following tasks:
- Installed the Flutter + Dart extensions
- Developed a simple Flutter web application
- Learned to use hot reload feature
- Tested code updates in the web device
Take your next lab
Continue your quest with [Flutter Startup Namer](https://google.qwiklabs.com/catalog_lab/1092https://www.cloudskillsboost.google/catalog_lab/3705stions:
Finish Your quest
This self-paced lab is part of the Flutter Development quest. A quest is a series of related labs that form a learning path. Completing this quest earns you a badge to recognize your achievement. You can make your badge or badges public and link to them in your online resume or social media account. See the Google Cloud Skills Boost catalog to see all available quests.
Next steps / learn more
Google Cloud training and certification
...helps you make the most of Google Cloud technologies. Our classes include technical skills and best practices to help you get up to speed quickly and continue your learning journey. We offer fundamental to advanced level training, with on-demand, live, and virtual options to suit your busy schedule. Certifications help you validate and prove your skill and expertise in Google Cloud technologies.
Manual last updated October 14, 2022
Lab last tested June 23, 2022
Copyright 2024 Google LLC All rights reserved. Google and the Google logo are trademarks of Google LLC. All other company and product names may be trademarks of the respective companies with which they are associated.